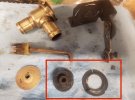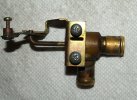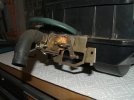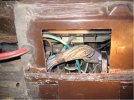
I'm curious, for the AC style heater box what is the value in keeping the water valve attached to the heater box? It seems like the mounting rivets could be drilled out and the valve could be installed before putting the box back in? It wouldn't bounce around since it clamps directly to the heater pipe.
Last edited: